- Posts: 52
- Thank you received: 1
HEADLINER QUESTION
- A.S. KOLLER
- Topic Author
- Offline
- Moderator
-
Registered
Less
More
22 Dec 2021 23:34 #44539
by A.S. KOLLER
Replied by A.S. KOLLER on topic HEADLINER QUESTION
Thanks for all your help guys, I really appreciate it
Have a great Christmas and New Year
Steve
Have a great Christmas and New Year
Steve
Please Log in or Create an account to join the conversation.
- wynlaidig
- Offline
- ACD Club Life Member
-
Registered
Less
More
- Posts: 259
- Thank you received: 44
22 Dec 2021 13:01 #44536
by wynlaidig
Replied by wynlaidig on topic HEADLINER QUESTION
Slotted oval with recessed washers. I think they are #6.
Please Log in or Create an account to join the conversation.
- mikespeed35
-

- Offline
- ACD Club Life Member
-
Registered
Less
More
- Posts: 886
- Thank you received: 194
22 Dec 2021 04:16 #44535
by mikespeed35
Mike Huffman
Replied by mikespeed35 on topic HEADLINER QUESTION
Oval head slot. Correct?
CORDially Mike
CORDially Mike
Mike Huffman
The following user(s) said Thank You: 1748 S
Please Log in or Create an account to join the conversation.
- Terry Cockerell
-

- Offline
- Elite Forum User
-
Registered
Less
More
- Posts: 1341
- Thank you received: 304
21 Dec 2021 19:08 #44529
by Terry Cockerell
T cockerell
Replied by Terry Cockerell on topic HEADLINER QUESTION
Yes, oval headed screws with countersunk washers.
T cockerell
Please Log in or Create an account to join the conversation.
- A.S. KOLLER
- Topic Author
- Offline
- Moderator
-
Registered
Less
More
- Posts: 52
- Thank you received: 1
21 Dec 2021 18:26 #44528
by A.S. KOLLER
Replied by A.S. KOLLER on topic HEADLINER QUESTION
Thanks Terry,
Not what I wanted to hear but it is what it is and it will be done.
The screws in the center windshield trim seem to be attached with oval head countersunk screws. Is that correct and do they use a countersunk washer under the head?
The devil is in the details.
Thanks
Steve
Not what I wanted to hear but it is what it is and it will be done.
The screws in the center windshield trim seem to be attached with oval head countersunk screws. Is that correct and do they use a countersunk washer under the head?
The devil is in the details.
Thanks
Steve
Please Log in or Create an account to join the conversation.
- Terry Cockerell
-
- Offline
- Elite Forum User
-
Registered
Less
More
- Posts: 1341
- Thank you received: 304
21 Dec 2021 00:53 - 21 Dec 2021 00:55 #44525
by Terry Cockerell
T cockerell
Replied by Terry Cockerell on topic HEADLINER QUESTION
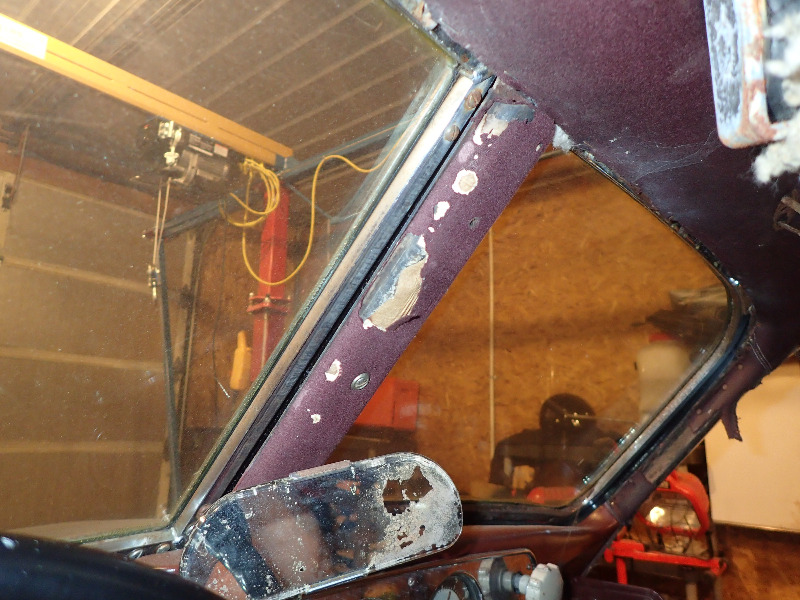
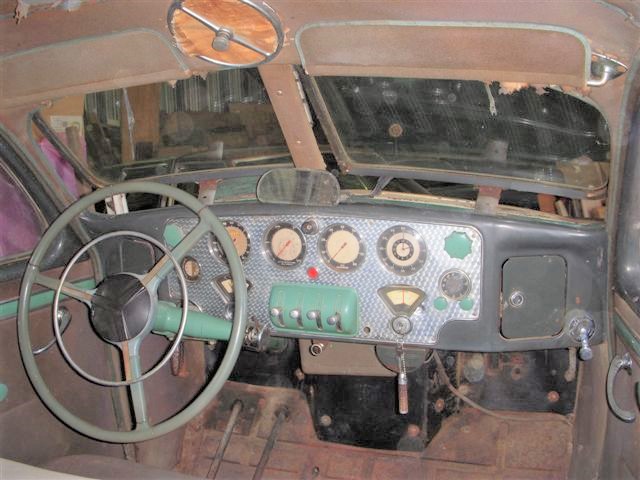
Steve it should continue down the sides of the A Pillars.
The first pictures shows an original car as photographed by Rick Hulett.
The second picture shows my Cord.
Merry Christmas and a Safe New Year.
Terry
The first pictures shows an original car as photographed by Rick Hulett.
The second picture shows my Cord.
Merry Christmas and a Safe New Year.
Terry
T cockerell
Last edit: 21 Dec 2021 00:55 by Terry Cockerell. Reason: Adding pictures
Please Log in or Create an account to join the conversation.
- A.S. KOLLER
- Topic Author
- Offline
- Moderator
-
Registered
Less
More
- Posts: 52
- Thank you received: 1
20 Dec 2021 22:05 #44524
by A.S. KOLLER
Replied by A.S. KOLLER on topic HEADLINER QUESTION
Sorry guys for asking so many questions but I do have one more.
Does the wire-on that goes across the top of the windshield go down the side post as well or does it end at the top of the windshield and get tucked under the top of the windshield post trim.
I have pictures of it being done both ways and frankly it looks a lot cleaner ending at the top of the windshield but which is correct.
Thanks
Steve
Please Log in or Create an account to join the conversation.
- JIM.OBRIEN
- Offline
- Premium Forum User
-
Registered
Less
More
- Posts: 586
- Thank you received: 217
06 Dec 2021 01:55 #44395
by JIM.OBRIEN
Replied by JIM.OBRIEN on topic HEADLINER QUESTION
Steve,
The wire should be inside the piping. Also if you glue the headliner to the metal pieces around the hinges you may have problems if you ever have to access the wiper motors. The only way to get to them is to pull the headling off above the windshield. The other option is to put an acces opening in the headliner. One way is to leave the access opeing open and glue the headliner around the opening. Then cover the wiper access plate with headliner material and screw the pate in. It is hidden behind the sun visors so you don't see them, but the judges usually see it.
Jim
The following user(s) said Thank You: 1748 S
Please Log in or Create an account to join the conversation.
- Terry Cockerell
-
- Offline
- Elite Forum User
-
Registered
Less
More
- Posts: 1341
- Thank you received: 304
04 Dec 2021 23:58 - 05 Dec 2021 00:00 #44385
by Terry Cockerell
T cockerell
Replied by Terry Cockerell on topic HEADLINER QUESTION
My headlining was the original and the wires were definitely inside the piping.
I had to cut the original wires out as they had rusted in.
The attached picture was taken before the restoration started. The seats had been redone in the mid 1970s in the wrong colour material.
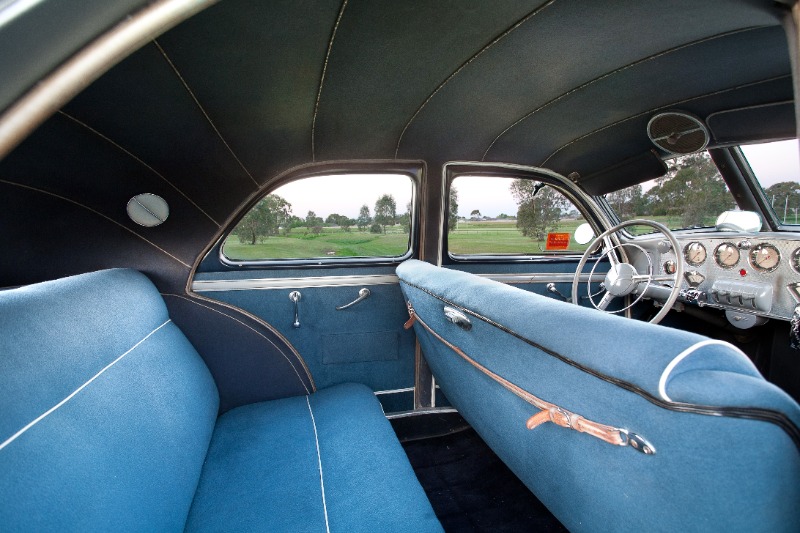
I had to cut the original wires out as they had rusted in.
The attached picture was taken before the restoration started. The seats had been redone in the mid 1970s in the wrong colour material.
T cockerell
Last edit: 05 Dec 2021 00:00 by Terry Cockerell. Reason: Adding picture
Please Log in or Create an account to join the conversation.
- A.S. KOLLER
- Topic Author
- Offline
- Moderator
-
Registered
Less
More
- Posts: 52
- Thank you received: 1
04 Dec 2021 23:42 #44383
by A.S. KOLLER
Replied by A.S. KOLLER on topic HEADLINER QUESTION
Thanks Wyn and Terry for your pictures and comments.
I now know what I need to make and hope that in can make them.
I picked up a chrome plated brass 22 gauge x 1 1/2 sink drain tube" (about 38mm) with a 90 degree angle on the end . The radius about right for the straight pieces and and hopefully I can get the compound curve pieces from
where the tube starts its bend.
I will let you know if it works.
Terry, with regard to some of your suggestions, I did make new wires for the
headliner from the patterns that you were kind enough to send me Thank again. I tried using 1/8 in wire but felt that it was flexible for the job so I used 5/32" stainless which worked well.
I have not be able to get a definitive opinion at to weather the wire should be inside the piping or not but it is now a mute point because there is no way to re-bend the end of the wires without heating them to cherry red..
I wont tell if you don't.
I did make floorboards for the inside of the cat for the headliner and it really is a big help.
HOPE ALL YOU GUYS OUT THERE HAVE A HEALTHY HAPPY HOLLIDAY
STEVE KOLLER
Please Log in or Create an account to join the conversation.
- Terry Cockerell
-
- Offline
- Elite Forum User
-
Registered
Less
More
- Posts: 1341
- Thank you received: 304
04 Dec 2021 08:25 - 04 Dec 2021 08:26 #44379
by Terry Cockerell
T cockerell
Replied by Terry Cockerell on topic HEADLINER QUESTION
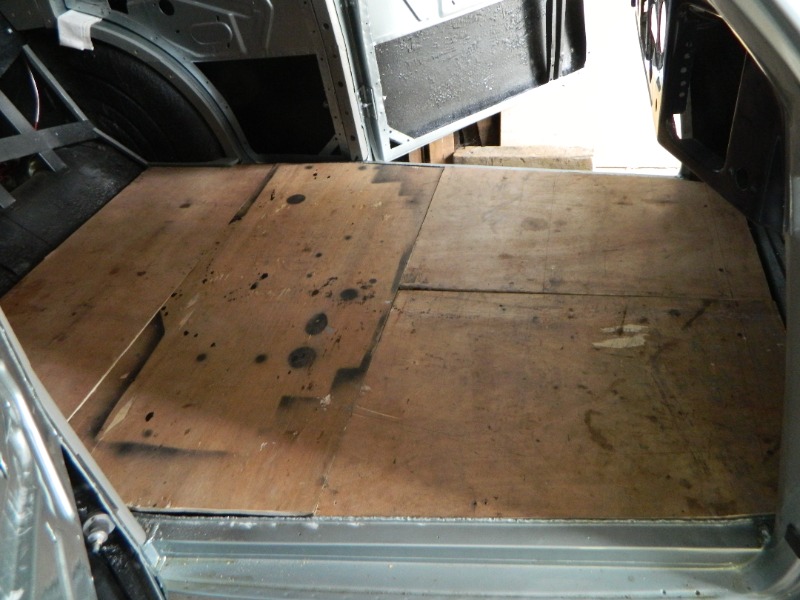
Steve to make the job of installing the headlining more comfortable for your upholsterer may I suggest that you fit a temporary flat wooden floor to the body. Mine was made out of thick plywood and various wooden strips to keep it level.
Also I had made and supplied new stainless steel rods that were stiched into the ribbing.
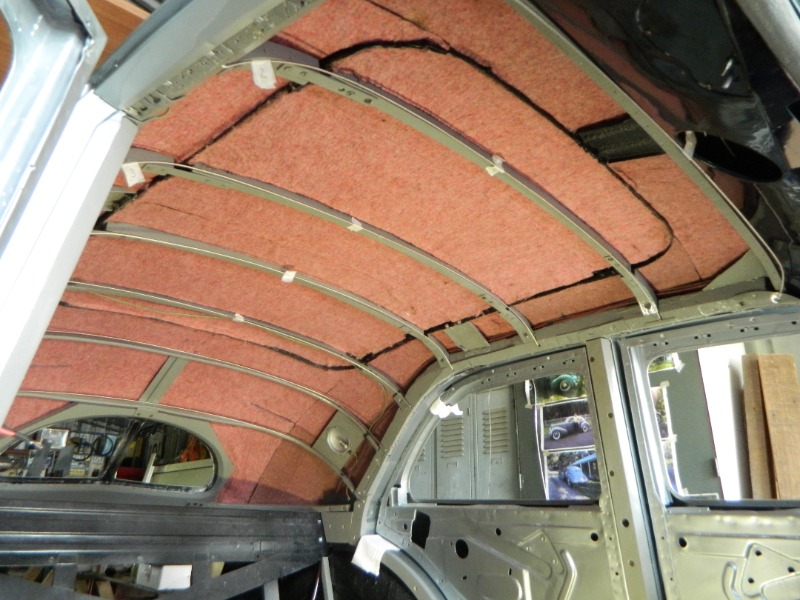
Also I had made and supplied new stainless steel rods that were stiched into the ribbing.
T cockerell
Last edit: 04 Dec 2021 08:26 by Terry Cockerell. Reason: Adding pictures
Please Log in or Create an account to join the conversation.
- Terry Cockerell
-
- Offline
- Elite Forum User
-
Registered
Less
More
- Posts: 1341
- Thank you received: 304
04 Dec 2021 01:25 - 04 Dec 2021 01:29 #44377
by Terry Cockerell
T cockerell
Replied by Terry Cockerell on topic HEADLINER QUESTION
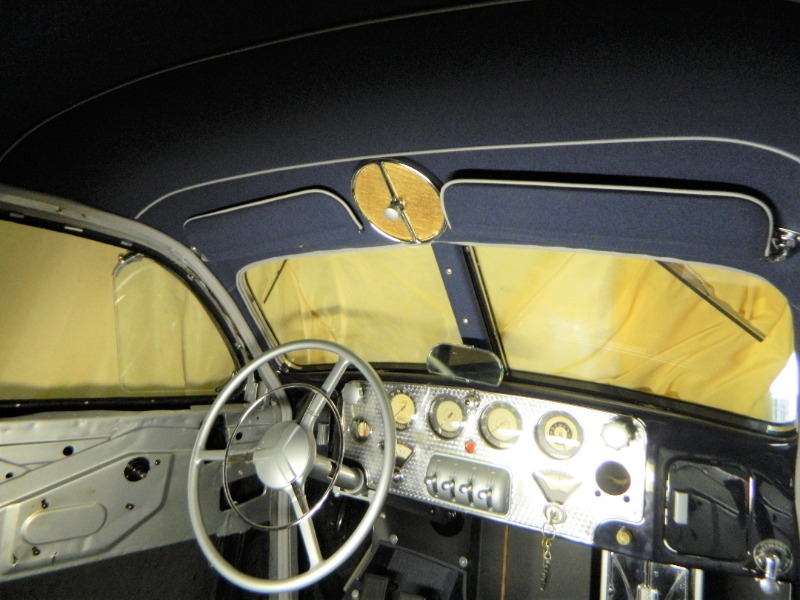
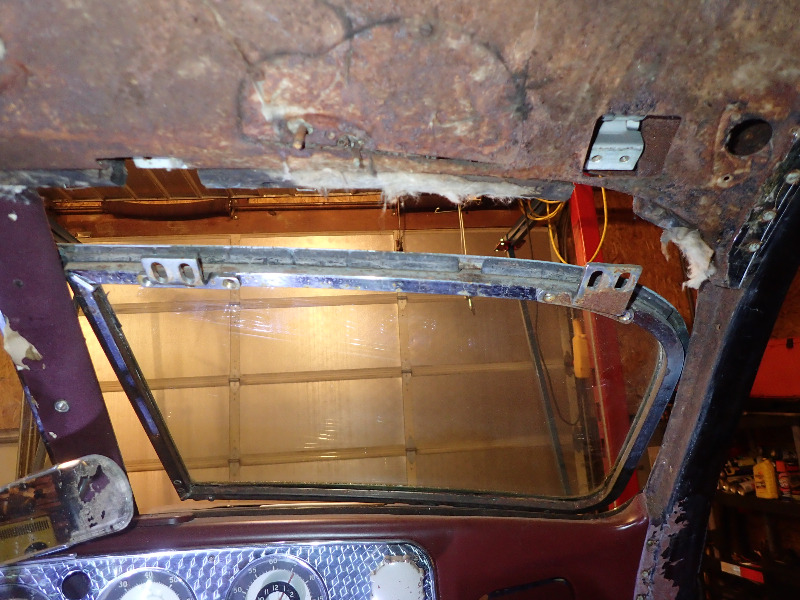
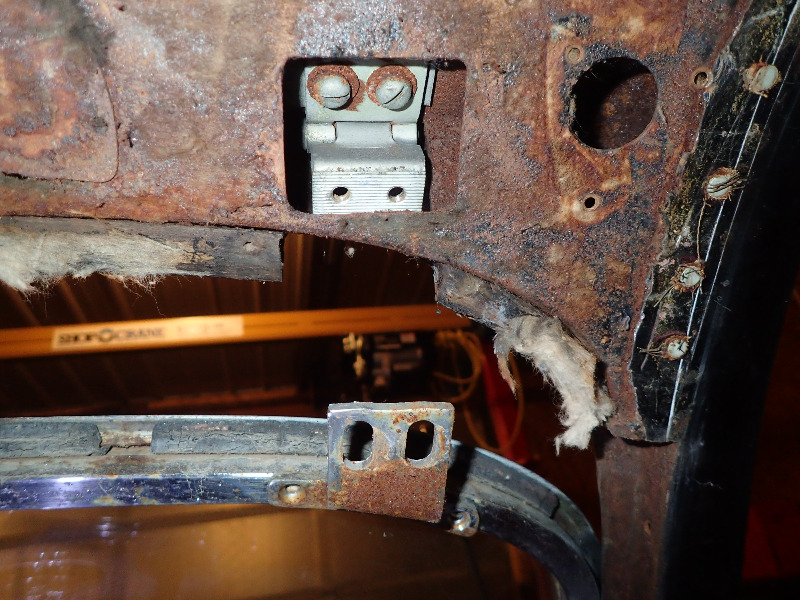
Steve attached are some pictures of the metal strips and wooden trim fixing pieces that go around the windshield openings. I made new wooden pieces.
The cloth is tacked to the wood and some glue could be applied to the metal strips before the wire edge welting is fitted.
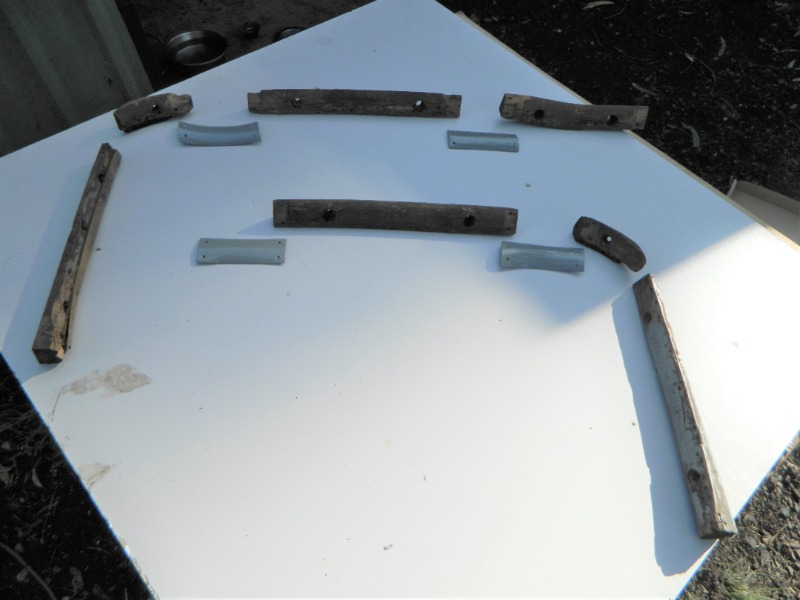
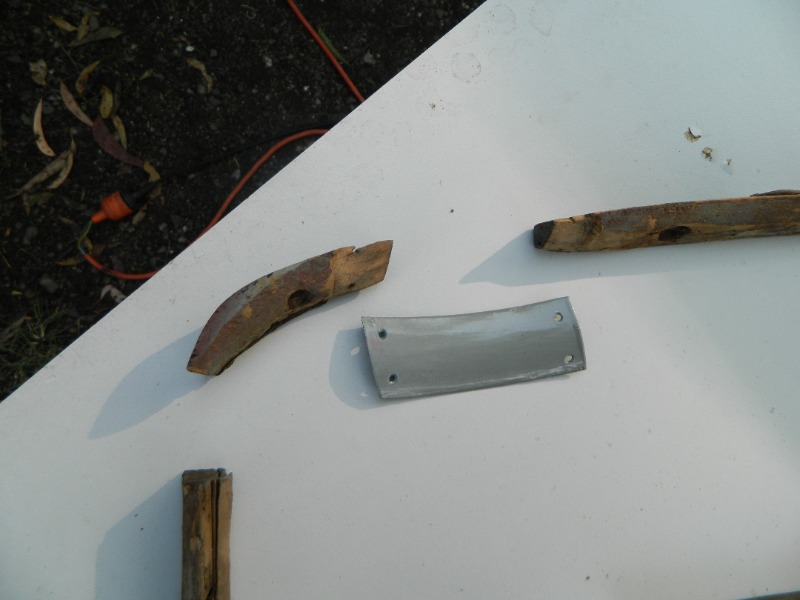
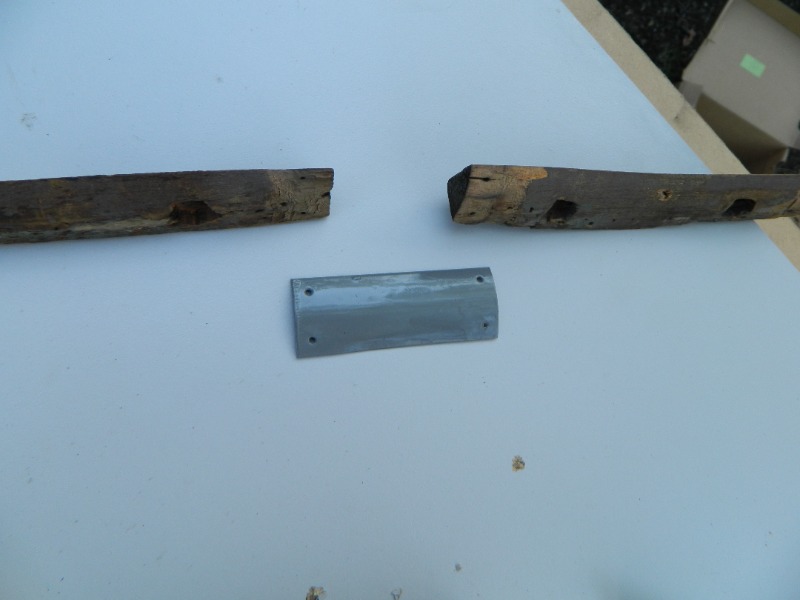
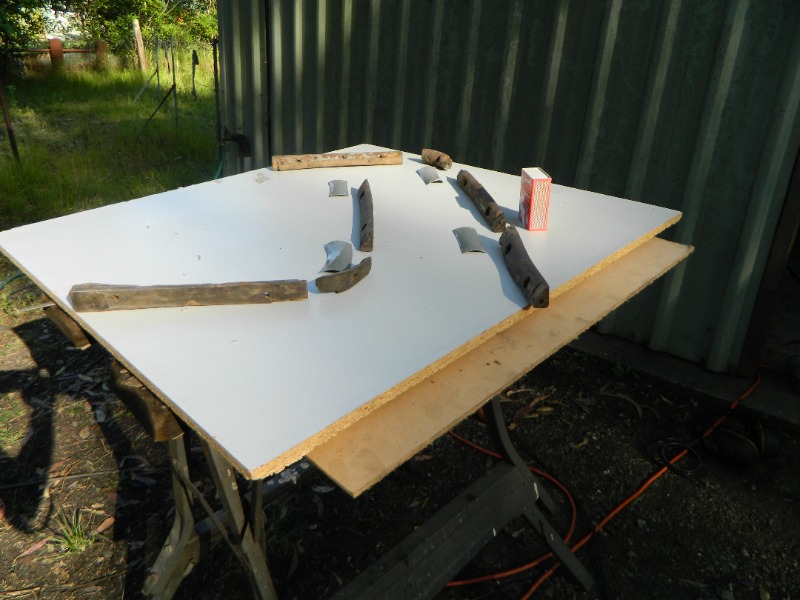
The cloth is tacked to the wood and some glue could be applied to the metal strips before the wire edge welting is fitted.
T cockerell
Last edit: 04 Dec 2021 01:29 by Terry Cockerell. Reason: Adding pictures
Please Log in or Create an account to join the conversation.
- wynlaidig
- Offline
- ACD Club Life Member
-
Registered
Less
More
- Posts: 259
- Thank you received: 44
03 Dec 2021 15:31 #44375
by wynlaidig
Replied by wynlaidig on topic HEADLINER QUESTION
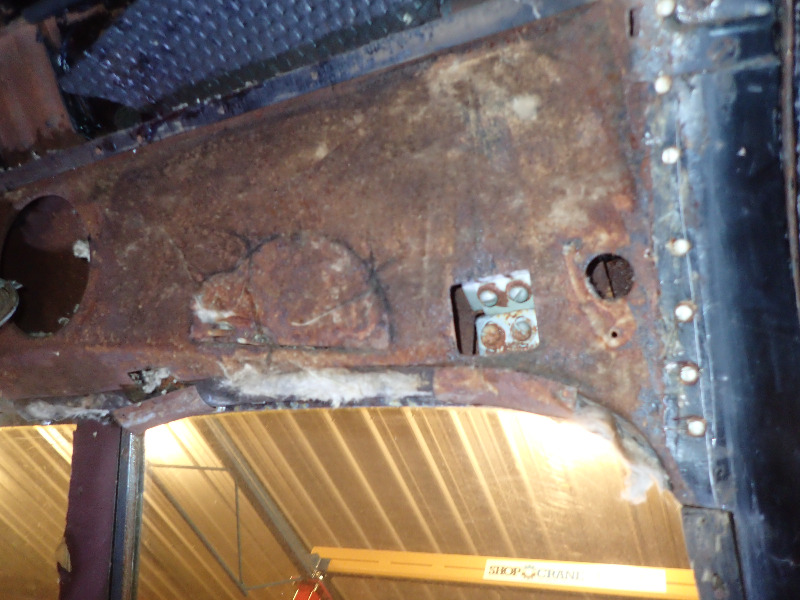
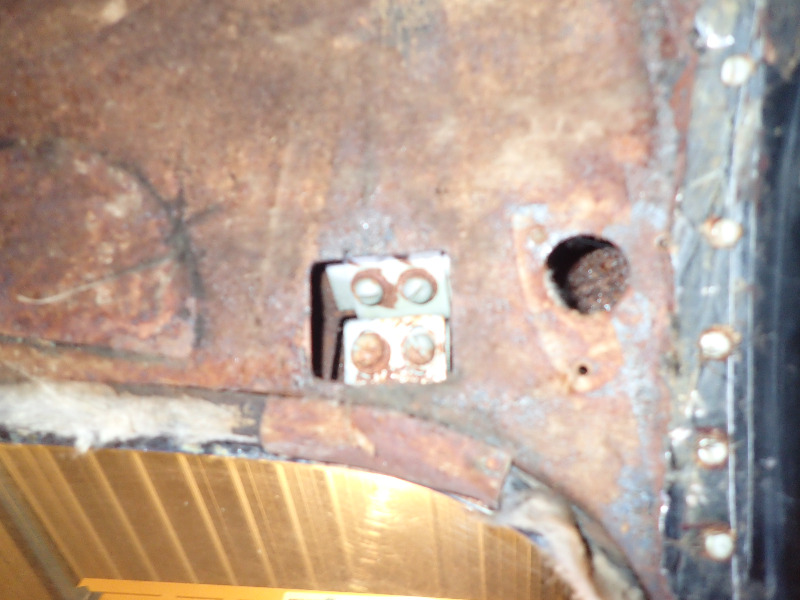
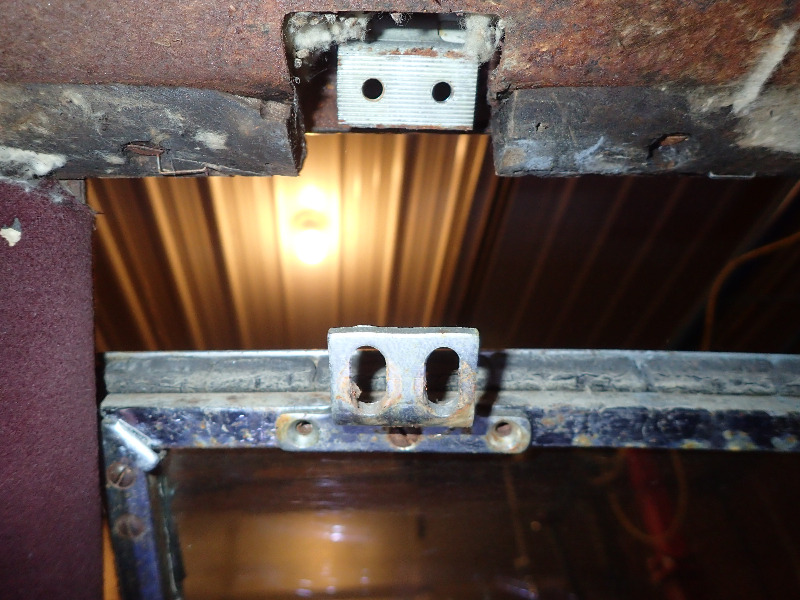
Here are a few photos of my 812 Custom Beverly showing the metal strips tacked to wood to bridge the gap. Not the best photos, but you get the idea.
Please Log in or Create an account to join the conversation.
- Terry Cockerell
-
- Offline
- Elite Forum User
-
Registered
Less
More
- Posts: 1341
- Thank you received: 304
03 Dec 2021 06:32 #44374
by Terry Cockerell
T cockerell
Replied by Terry Cockerell on topic HEADLINER QUESTION
Steve there are sheet metal strips that bridge the gaps between the wooden fixing pieces. We are on our way out to dinner right now. I will follow up with some pictures tomorrow.
Terry
Terry
T cockerell
Please Log in or Create an account to join the conversation.
- A.S. KOLLER
- Topic Author
- Offline
- Moderator
-
Registered
Less
More
- Posts: 52
- Thank you received: 1
03 Dec 2021 00:46 #44372
by A.S. KOLLER
HEADLINER QUESTION was created by A.S. KOLLER
Hi Guys,
I am just about ready to get my 37 812 Beverly to the upholstery shop to have the headliner installed.
The question is, how does he attach the headliner across the four open gaps in the windshield surround wood where the four hinges are located.
I realize that the wire on is stiff enough to bridge the gap but what about the headliner itself?
I am sure the upholsterer can probably find a way to do it but I want to be sure it is done correctly.
Thanks
Steve Koller
Please Log in or Create an account to join the conversation.